There are many thousands of products out there that are available to a field photographer and hiker, and it is really hard to determine what products fit your needs. It can be really frustrating, because not all of these products are available for you to see in your local store. Besides, how do you really know if something is going to work for you unless you test it out for a few days?
Here are some our favorite items that my wife and I use while hiking and taking wildflower photos. Everything I show here is highly recommended, and I use them all! The list here will change from time to time, as I upgrade my kit or come across new things to try.
Note that for product links to Amazon from this page, as an Amazon Associate, I may earn a small commission from qualifying purchases. These commissions help cover a portion of my expenses for running this website. And, again, I use everything that I list here.
Please also view my Wildflower Books page, where I list the books that I rely on.
Photography Equipment That I Use
Any good camera can be used if you have the right kind of lens. I prefer to use DSLR cameras because the quality of the camera is still very superior to a smartphone, if you know how to use it. I do use a newer iPhone for some “trail shots” because that is quick and easy, with GPS coordinates.
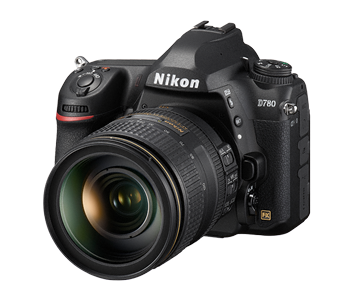
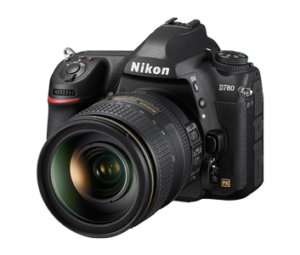
Nikon D780
The max resolution is 24.5 megapixels, which suits the kinds of photos I’m taking. I almost purchased a Nikon D850, which tops out at an amazing 47 megapixels, but the D780 has a better sensor when it comes to color range and light sensitivity.
I am currently exploring moving to a mirrorless camera, and I will add more information on that soon.
Tamron 90mm Macro Lens
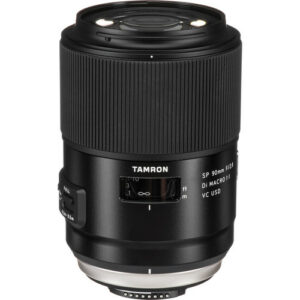
My primary lens for wildflower closeups is my Tamron 90mm F/2.8 Di VC 1:1 Macro lens. I find that a good macro lens lets me get the kind of shot that I like. I’m happy to get down on my knees in the dirt (or mud, or water) to get that closeup. You can also stand further back and use a good telephoto lens, but that creates a flatter image and I’m not usually happy with that. This is a rugged lens with outstanding optics. It replaces the Nikon AF-S FX NIKKOR 60 mm f/2.8G macro lens that I’ve used for years, which also is a great, rugged lens. The 90mm Tamron lens is a bit heavier, but a 90mm lens lets you get a bit further back than a 60mm lens.
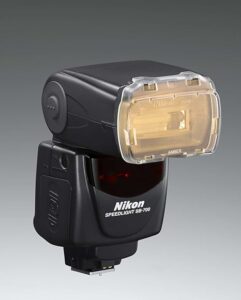
Nikon SB-700 Speedlight Flash
I generally prefer to work with natural light, but there are times when a good flash is useful. On windy days you can freeze motion, and late in the afternoon it can help to have a flash to fill in.
I’ve been using the Nikon SB-700, which works very well with my Nikon cameras without being too bulky. The combination of the SB-700 and the D780 camera allows me to set a “sync speed” that is faster than1/250, which is very important.
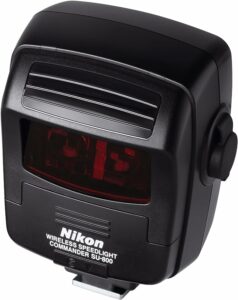
Nikon SU-800 Wireless Speedlight Commander
This is a new addition. For some of my macro photography, such as insect closeups, sometimes I want the flash to be located to the side rather than directly on top of the camera
The Nikon SU-800 Wireless Speedlight Commander attaches to my camera hot shoe, which allows me to move my flash off to one side or the other. The commander unit will control the speedlight.
Peak Design Travel Tripod
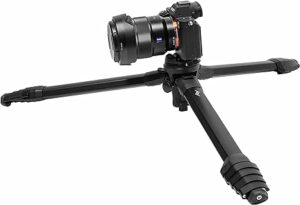
I have purchased many tripods over the years, and without question the Peak Design travel tripod is the best tripod I’ve ever owned. Light weight, sturdy, collapses to fit in a water bottle pocket in my backpack, rugged. You can remove the center column so that you can get right down to the ground (as shown here).
There are two versions, aluminum and carbon fiber. The carbon fiber one is lighter but more expensive. I have the aluminum version, which still is very light.
Peak Design is an outstanding company, and you get a lifetime warranty. A clip on one leg broke, I got an entire replacement leg without any difficulty (just make sure you register your product and keep receipts).
Peak Design Capture Camera Clip and Pro Pad Stabilizer
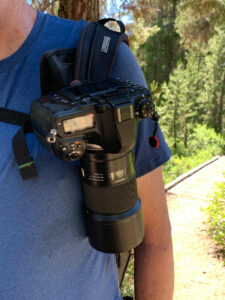
There are two complimentary products that I use from Peak Design to hold my camera: the Peak Design Capture Camera Clip and the Peak Design Pro Pad Stabilizer. The Camera Clip hooks on to my shoulder strap on my backpack or messenger back. There is a plate that attaches to the bottom of my camera, and that plate slips into the clip. I can hike with my camera sitting on that clip, and when I want to take a photograph I just push a button on the clip and the camera is released. This is much easier than using a camera shoulder strap! I don’t have a camera swinging on a strap and banging into things, I don’t have to stop to fish the camera out of my backpack. It is right there, ready to use. The bottom plate also is compatible with my tripod.
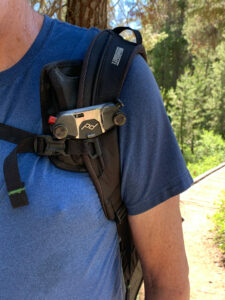
I prefer to attach the clip to my backpack shoulder strap rather than to my belt as is sometimes shown in product photos. Sometimes, though, the Camera Clip can be a bit uncomfortable. This is where the Pro Pad Stabilizer comes in – it fits around the Clip to add some extra padding, which is very appreciated.
Note that you need to match the proper Stabilizer model with the proper Camera Clip model. Amazon doesn’t always carry all of the models.
Hiking Equipment That I Use
Peak Design Everyday Backpack
I keep searching for the perfect backpack to use for hiking. Room for my equipment. Room for lunch. Room for extra jackets. Room for all the little things that I always need. Comfortable and easy to get to the equipment.
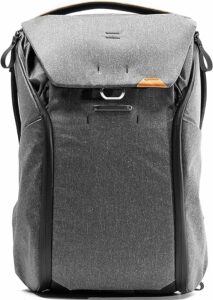
So far, my best backpack is the Peak Design Everyday Backpack 30L. Extremely rugged (and a lifetime warranty), expandable, a great camera pack with access. It isn’t the perfect pack, but it is the best one I’ve used so far.
Photo Processing Software
Yes, I “process” my photos. I don’t “Photoshop” them (as in, altering them) to any significant degree. Digital cameras usually don’t take perfect pictures when you are out hiking in variable conditions. You may need to adjust the exposure, reduce “noise” introduced by the camera itself, crop the photo, and so forth. Sometimes I’ll play with “focus stacking” and use software to merge several photos into one, so that you can see all of the details of a wildflower that was shot in the field under less than optimal conditions.
I use a number of software tools to do my final processing, and I’m always exploring new products.
Adobe Lightroom Classic
I used to only purchase desktop software, where you could buy something and own it forever. However, Adobe has finally convinced me that a subscription for their software makes sense. I have the Adobe Creative Cloud Photography Plan. They are continually providing worthwhile updates, and the subscription price is reasonable. You get both Lightroom and Photoshop, along with a large number of mobile apps that I use on my iPad. Lightroom is a key product for organizing photos, removing spots, as well as adjusting exposure, cropping and so forth. My main use for Photoshop is to create collages and posters (I don’t do major editing of photos).
Zerene Stacker
I’m beginning to explore the complexities of “focus stacking”, where you take multiple photos of your subject at different focus points, then mix those together to get a combined photo that has ALL of the elements in focus. Believe me, it isn’t easy, but the results are very interesting! You need software that can stitch these photos together, using only the parts that are in focus. Adobe Lightroom Classic has this capability, but it doesn’t always give you great results. My tool of choice is Zerene Stacker. I will be posting photos that I’ve created with this at some point, when I find the time.
